Mail, Mail, Everywhere! Managing Email Across Multiple Devices
Smartphones and tablets have made it possible for us to be connected at all times, whether it be for business or for leisure. Sometimes you just can’t pull out your laptop or turn on your desktop to answer an email, and that’s why it’s important to be able to access your messages on all of your devices. Technology is constantly changing and permanent and efficient email solutions are now available across multiple devices thanks to internet standard protocols.
Internet standard protocols are used to retrieve email messages from a remote mail server over a TCP/IP connection. There are several different versions of these protocols, but for the purpose of this article we will look at the most common ones: IMAP and POP3.
IMAP VS. POP3
Internet Message Access Protocol or IMAP allows you to use multiple devices to check and see replies and new messages from your email because it allows email to stay and be stored on the servers. IMAP is the preferred internet standard protocol for most email clients (i.e. Outlook, Gmail) today.
POP3 retrieves emails by downloading and storing them onto an individual device. This makes it impossible to see replies and new messages across all of your different devices. Typically, most email clients no longer use POP3.
With most email clients embracing IMAP, seeing messages across multiple devices is mostly a non-issue. However, there are some cases where one device may utilize IMAP, while another device uses POP3. This will prevent you from being truly able to see all of your messages on all of your devices. So what should you do? Well, there are many ways around this dilemma, some are quick fixes, and some are more elegant solutions.
The Quick Fix
The not-so-elegant solution is just to blind carbon copy (Bcc) your own email address on every new message that you send, including replies. All of these messages would be sent to your regular inbox in Outlook. We suggest using Bcc instead of carbon copy (cc) so that the recipient doesn’t wonder why you copy yourself on all of you messages, an action that could be viewed by others as silly or unprofessional.
Apple’s iOS allows you to streamline this process
Simply visit your Settings, select Mail, and scroll down to the section that says “Always Bcc Myself” and turn it on. (see figures 1 and 2)
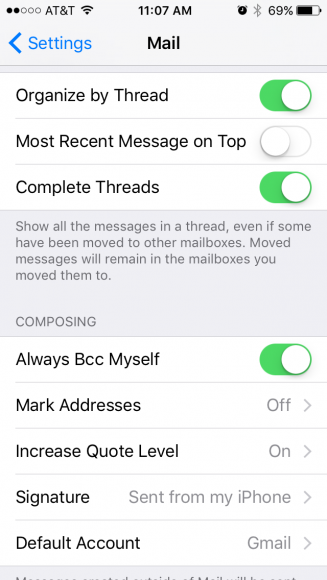
(figure 1)
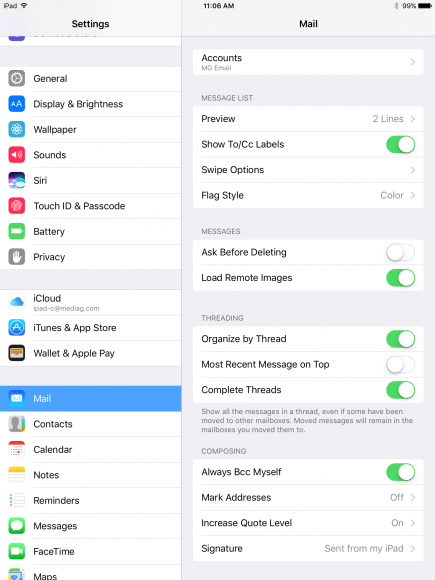
(figure 2)
Then, you can set up a rule in Outlook (see below instructions). This rule is called “Save Sent Bcc Messages from iPad/iPhone.” Basically, each incoming message that is not addressed to you (something you sent to someone else), but is from you (you sent it from your iPhone or iPad, and Bcc’d yourself) is automatically moved to your sent messages.
How to set up an email rule for Outlook 2013 and 2016
Step 1
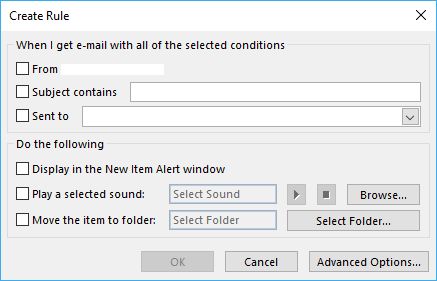
Under the “Home” tab, in the “Move” section, there is a button called “Rules”. When pressed, it will reveal a menu. Choose the option “Create Rule…”.

Step 2
On the resulting window, click “Advanced Options”.
Step 3
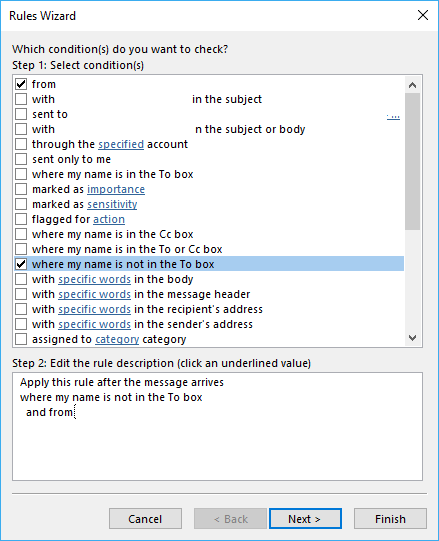
A new window with the title “Rules Wizard” opens. In the box labeled “Step 1”, enable the “from (email address from the last message that was highlighted in the main view)” and “where my name is not in the To box” options.
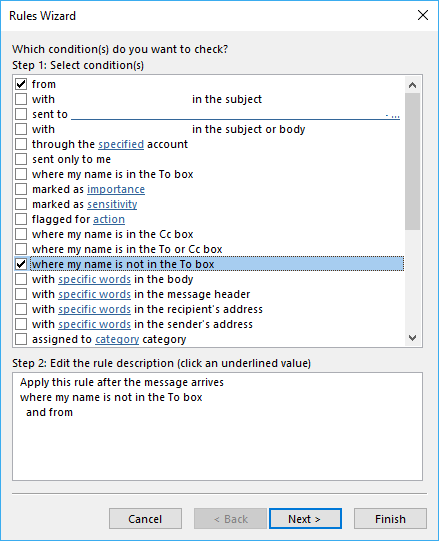
Step 4
In the box labeled “Step 2”, click on the email address that is specified in the “and from” line, and a new window will appear. Use the form provided on that window to change the email address to yours. Click OK to accept the changes, then click “Next” on the “Rules Wizard” window to continue.
Step 5
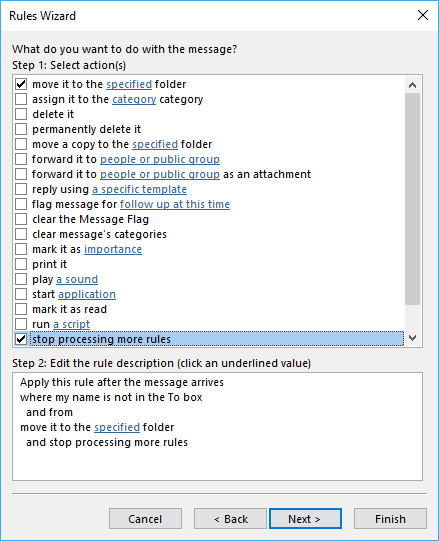
On the next page, in the box labeled “Step 1”, enable the “move it to the specified folder” and “stop processing more rules” options.
Step 6
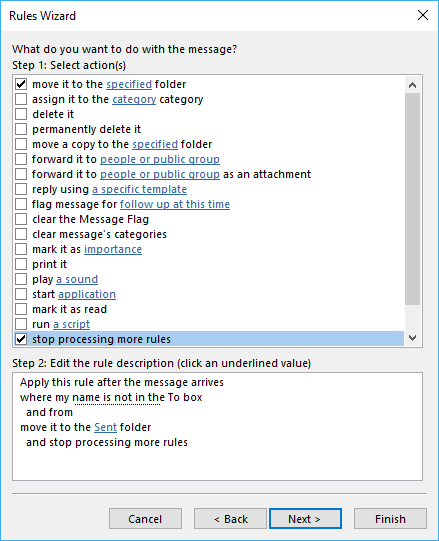
In the box labeled “Step 2”, click where it says “specified” on the “move it to the specified folder” line. A new dialog box called “Rules and Alerts” will open. Use the form provided in that dialog box to select your Sent or Sent Items folder. Click “OK” to accept the changes, then click “Finish” on the “Rules Wizard” window to add the new rule to Outlook.
Now, every message you send from your iPhone or iPad is automatically put in your sent folder in Outlook. This will centralize all of your sent messages from multiple devices in one location where you can reference or archive them.
The Permanent Solution
If you want a more streamlined, and elegant solution, you’d ideally use your computer to create a new account with IMAP capabilities. Before you do this, however, make sure that you archive your emails from your current account. Learn how to archive your Outlook emails here.
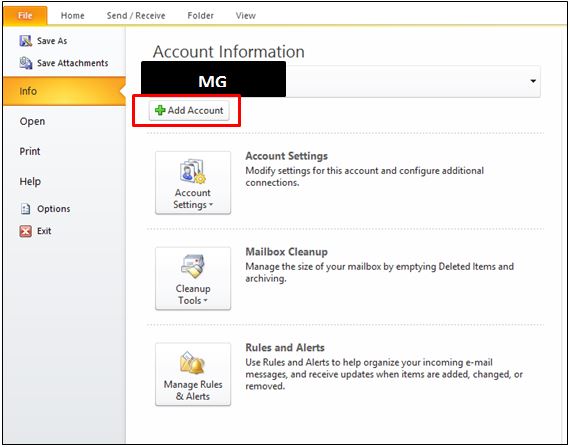
First, open up your Outlook on your computer and select Account Information under the File tab. Click Add Account.
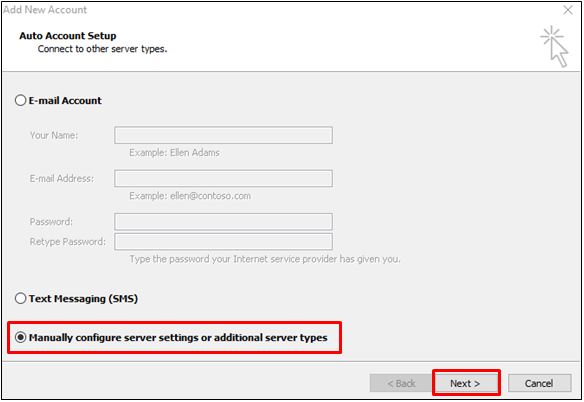
Next, select Manually configure server settings or additional server types and click Next.
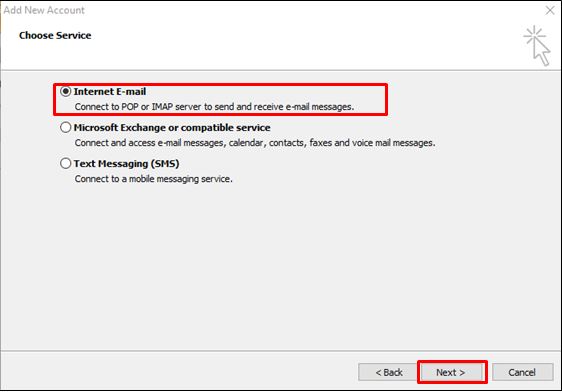
Make sure Internet E-mail is selected and click Next.
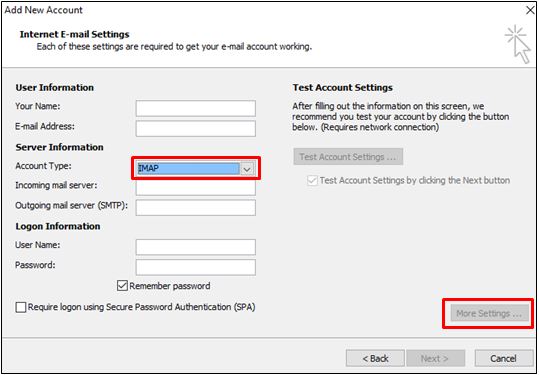
At this point, you should enter your name and email address. Under Account Type make sure you select IMAP. Then, enter your incoming mail server and outgoing mail server. And finally, enter your username and password. Your username is your full email address. Then, click More Settings.
Under the Outgoing Server tab, check off that your Outgoing server requires authentication then click on the Advanced tab.
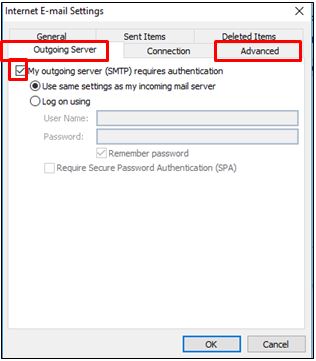
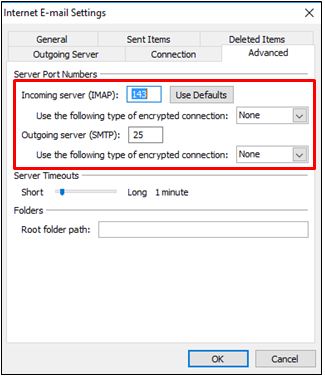
Set your IMAP server name reference for both the incoming server and the outgoing server along with your type of encrypted connection.
Now, you’ll be able to access all of your email across multiple devices. Your emails will be saved onto a server, allowing your email to be completely centralized.
Do you need help with any IT support or do you want to centralize your data? Give us a call at 248.687.7888 or email us at inquiry@mediag.com for more information on how we can help you.

.png)